
Most searches for solar street light installation start with a video of someone clamping a lamp onto a pole in ten minutes. The video is not wrong. But it skips what decides whether that lamp is still working in year three: the survey, the foundation, the anchor bolts, and the tests nobody filmed. This guide walks the whole chain, from “is my site even suitable” to the acceptance sheet you sign at handover.
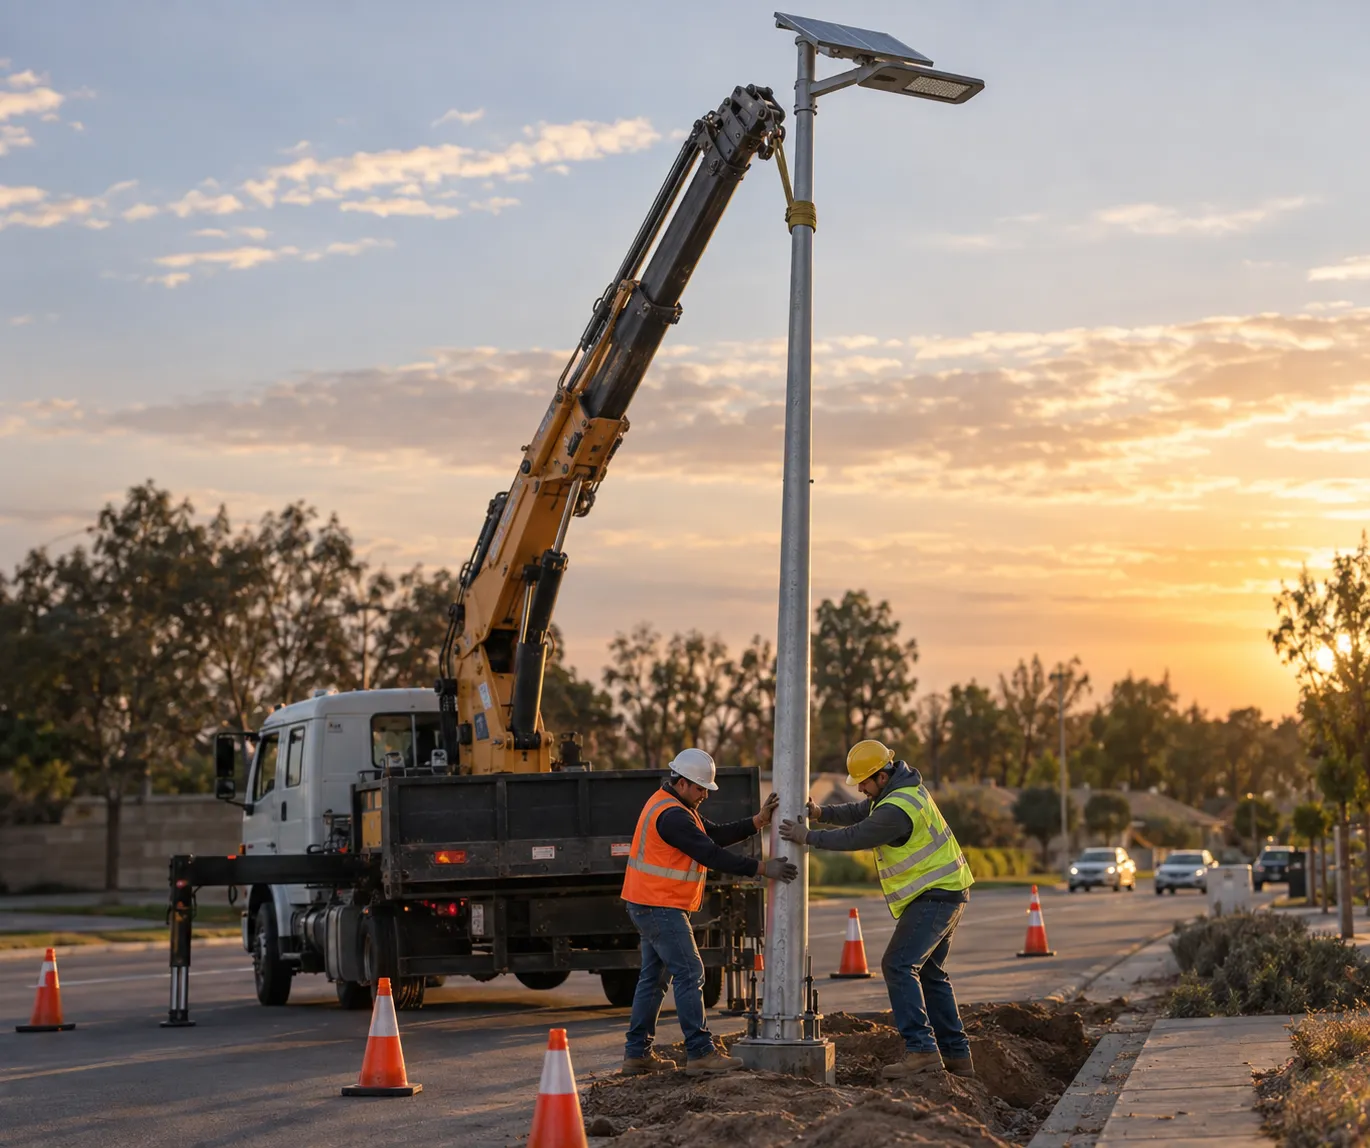
What a Pole-Mount Solar Street Light Is (and What It Isn’t)
A pole-mount solar street light is a self-contained lighting system. A photovoltaic panel charges a battery through a charge controller during the day, and after dark the controller discharges that battery through an LED head. No trench, no feeder cable, no utility meter, no electricity bill. A grid-powered street light needs all four, which is why its installation cost lives or dies on how much digging and cabling your site demands.
That said, “no wiring” does not mean “no engineering”. Every unit still sits on a pole, and every pole needs a base. Depending on the site, that base is a new concrete foundation with anchor bolts, a clamp that retrofits onto an existing pole, or a wall bracket. How much work you are actually buying is decided here, before you ever open the lamp’s box.
One boundary before we go further. This article covers pole-mount street lights: the kind that go 3 to 12 meters up, carry engineering-grade batteries, and get inspected at handover. It does not cover stake-style garden or pathway lights, even though product listings often blur the two. If a garden light is what you are after, the siting logic in this guide still applies; the civil-works sections do not.
The Three Builds: All-in-One, All-in-Two, and Split Systems
Open any supplier catalog and you will meet three construction formats. The differences are not cosmetic. They decide what gets lifted, what gets bolted, and what gets swapped when something fails at height.
The five components stay constant across all builds: an LED head, a photovoltaic panel, a battery, a charge controller, and the pole with its base hardware. What changes is how those components are packaged.
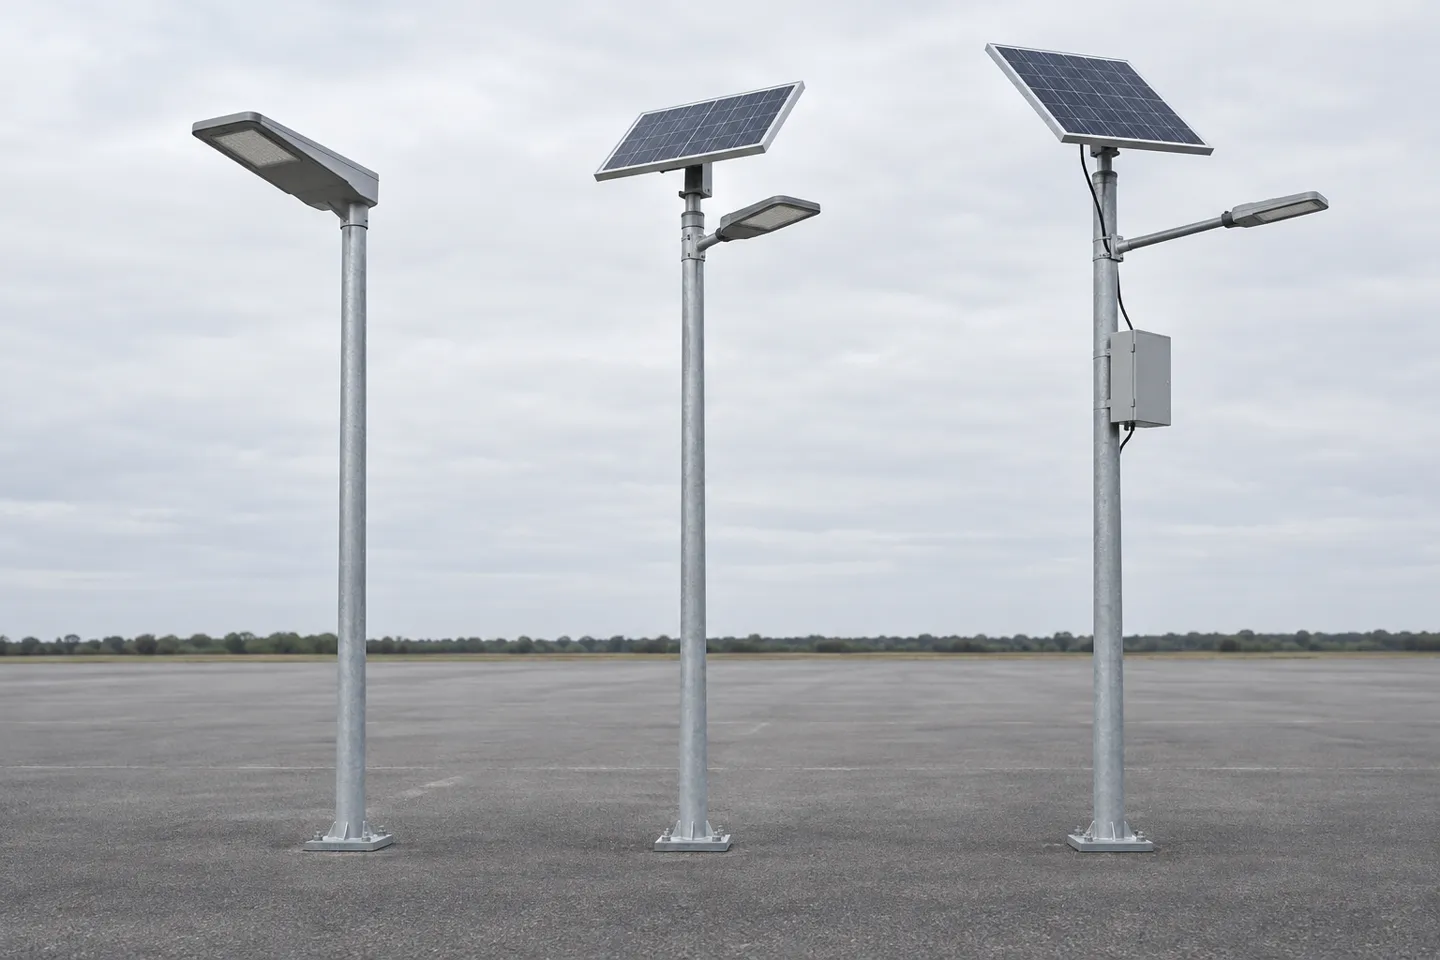
⭐ All-in-one units fold panel, lamp, battery, and controller into a single housing that clamps onto the pole in one lift. Installation is the fastest of the three, which is why this format dominates parking lots, campuses, and rural roads. The trade-off shows up years later: if the battery dies, the whole unit comes down for service.
All-in-two designs split the assembly into a lamp head and a separate panel. The panel gets its own bracket, so you can set its angle independently of the lamp’s aiming. Servicing means handling one component instead of the whole assembly.
Split systems keep panel, lamp, battery, and controller fully separate, often with the battery in a vented box on the pole or in the base. Nothing is integrated, so nothing is easy: civil works, wiring between components, and commissioning all grow. In exchange, split systems serve high-mast and high-wattage projects where integrated housings cannot dissipate heat or carry enough panel.
One rarer option, worth a single sentence: hybrid units that keep a grid connection as backup for stretches of weather the battery cannot bridge. They exist mainly in weak-insulation or high-reliability contracts.
Three builds, three sets of installation consequences
| Build | Install action | Maintenance action | Typical scene |
|---|---|---|---|
| All-in-one ⭐ | One clamp-on lift, fastest install | Replace or drop the whole unit | Parking lots, campuses, rural roads |
| All-in-two | Mount head and panel separately, set panel angle independently | Swap one component at a time | Roads needing precise panel aiming |
| Split | Full civil works plus component wiring | Service each part in place | High-mast, high-wattage, high-wind projects |
Notice the pattern as you compare rows: integration moves work from the installation phase into the maintenance phase, and back. That trade is the quiet decision behind most solar street light projects. Settle it before quotes go out: it changes what your crew lifts and what your contract covers.
Is Your Site Right for Solar?
Before any concrete is mixed, walk the site and answer five questions. If two or more answers come back negative, solar may not be your answer. Finding that out now is the cheapest thing you will do on this project.
Site check
- 1Sun window: is the mounting point free of building and tree shade through the day, including winter sun angles?
- 2Peak sun hours: tropical and subtropical regions generally sustain a standalone system; high-latitude winters need a larger array or a hybrid backup.
- 3Wind load: coastal flats and open plains demand stronger poles and deeper foundations.
- 4Theft exposure: remote public sites need structural anti-theft measures, not just management promises.
- 5Pole height vs road width: roughly 3–4 m for garden paths and lanes, 4–6 m for parking areas and collectors, 6–12 m for arterial roads.
The grid comparison fits in one line: a solar street light trades trenching, cabling, and an electricity meter for a higher price per lamp. Whether that trade wins depends mostly on how far your site sits from existing power infrastructure.
The market has already voted on this trade at scale. Solar street lighting was valued at USD 9.5 billion in 2024 and is projected to reach USD 22.5 billion by 2030, a 15.8% CAGR (Strategic Market Research, 2025). Municipalities already account for over 70% of that market, and standalone off-grid units hold about 60% share. Read those numbers as a buyer. Street lighting budgets are shifting from utility line items to lighting procurement. That changes who signs, who inspects, and which clauses decide disputes. It also pulls in suppliers of every quality tier, which makes the installation and acceptance disciplines in the next two sections worth more, not less.
Installation: From Foundation to Fixture
This is the section the ten-minute videos skip. Solar street light installation is a construction sequence, and each step has a failure mode that someone, somewhere, has already paid for.
The four work packages, in order
Before You Dig: Survey, Tools, and Crew
Fix the pole positions on paper first, against the road width and lighting spacing from the siting check. Then verify sun access at each exact position, not just somewhere on the street.
Assemble the crew and kit before the truck rolls. The kit needs an anchor-bolt template matching the pole base, a spirit level, a torque wrench, and lifting equipment rated for the pole and fixture weight. The crew needs a rigger certified for the lift. For retrofit clamps and wall brackets, add a structural check that the host pole or wall can carry the cantilevered load, wind included.
Eaton’s installation guidance puts the first hard gate clearly. Before pouring a concrete foundation, confirm that the anchor bolt circle template conforms to the bolt circle of the pole base (Eaton, n.d.). A bolt circle cast in the wrong pattern cannot be argued with later. It can only be drilled, epoxied, or re-poured.
A site survey that raises more questions than a catalog can answer is normal at this stage — WOSEN’s engineers answer installability questions with a 12-hour response on overseas inquiries.
Ask an installation questionFoundation and Anchor Bolts
Foundation dimensions follow the pole height, the fixture’s wind area, and the soil report, in that order of authority. The manufacturer’s or engineer’s drawing overrides rules of thumb. Set the anchor bolts with a template, check their projection above the concrete, and plumb each bolt before the pour stiffens.
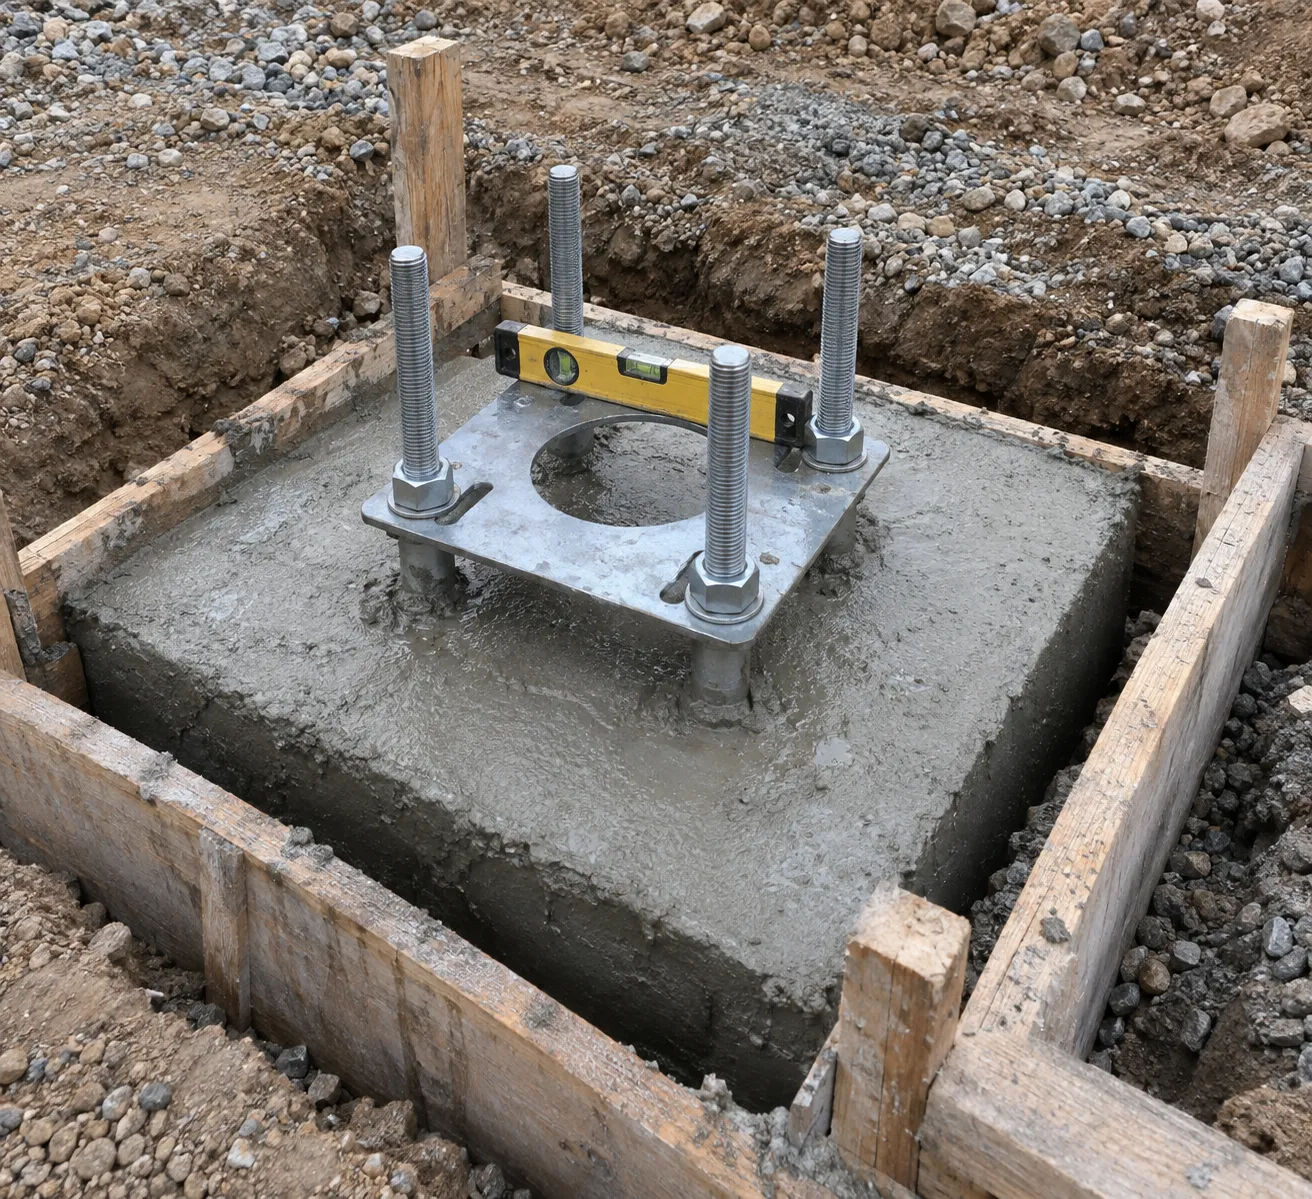
Then wait. Poles go up only after the concrete has cured to the strength the project specification calls for. Real sites verify that with cylinder tests, not calendar days. Every crew that has watched a pole lean after an early erection knows why this line exists.
Here is the failure that anchors this whole section. The engineering forum Eng-Tips hosts a thread of streetlamp anchor failure photos. A practicing engineer walked through one case: the foundation had been cast out of plumb, and the crew bent a mislocated anchor bolt sideways to force it through the base plate hole. The whole assembly carried that hidden damage until it showed (Eng-Tips, 2021). A bent bolt forced through a misaligned hole is not an installed anchor; it is a scheduled failure.
Field failure, documented — Eng-Tips, 2021
Foundation faults never show on delivery day. They surface in year two.
Out-of-plumb casts. Bolts bent to reach their holes. Poles raised on young concrete. Invisible at handover — and load-bearing for a decade.
Pole Erection and Fixture Mounting
Lift, do not heave. Poles are hollow extrusions, and a side load during erection is how lamps get their first hidden crack. Set the pole on the leveling nuts, check verticality in two axes, then torque the top nuts in the pattern the pole manufacturer specifies.
For clamp-on retrofits, the bolt torque and the clamp’s grip length matter more than muscle; a slipping clamp polishes the pole until the lamp rotates out of aim. For new foundations, this is also the moment to dress the internal cables. Solar units still have connectors inside the pole and head, and every one needs to be seated and sealed. The IP65 rating on the label was earned at the factory with the glands torqued.
Orientation and Tilt
Point the panel at the sun, not at the road. In the northern hemisphere the panel faces true south; in the southern hemisphere, true north. For a fixed install, a tilt angle equal to the site latitude is the standard year-round compromise (New Mexico State University, n.d.). All-in-one units tilt with the lamp’s aiming and accept the small loss. All-in-two and split systems let you optimize the panel separately, a real gain at higher latitudes.
Re-check shade once more from the panel’s own position. A branch that misses the road can still cross the panel for two hours every morning. Two hours of morning sun is a meaningful share of a winter charge.
The matrix below collects the discipline of this section into one field sheet.
Installation boundary matrix: common mistakes and the check that catches them
| Work package | Common mistake (real failure pattern) | Checkable criterion or action |
|---|---|---|
| Bolt setting-out | Bolt circle cast against memory instead of template | Template conforms to pole base before pour (Eaton guidance) |
| Foundation & curing | Early erection on young concrete | Cylinder test or spec strength confirmed before lift |
| Pole erection | Side load cracks the pole during lift | Certified rigger, rated gear, verticality in two axes |
| Fixture mounting | Under-torqued clamp rotates out of aim | Torque wrench on specified pattern |
| Panel orientation | Panel aimed for looks, not latitude | Tilt ≈ site latitude, true-south/north facing (NMSU) |
| Connectors | Loose glands quietly break IP65 | Seat and torque every internal connector |
Commissioning, Failure Diagnosis, and Theft Hardening
Erecting the pole ends the construction phase. It does not end the project. What remains is proving the system works, knowing why it will not if it does not, and making sure it is still there next quarter.
Commissioning and Acceptance
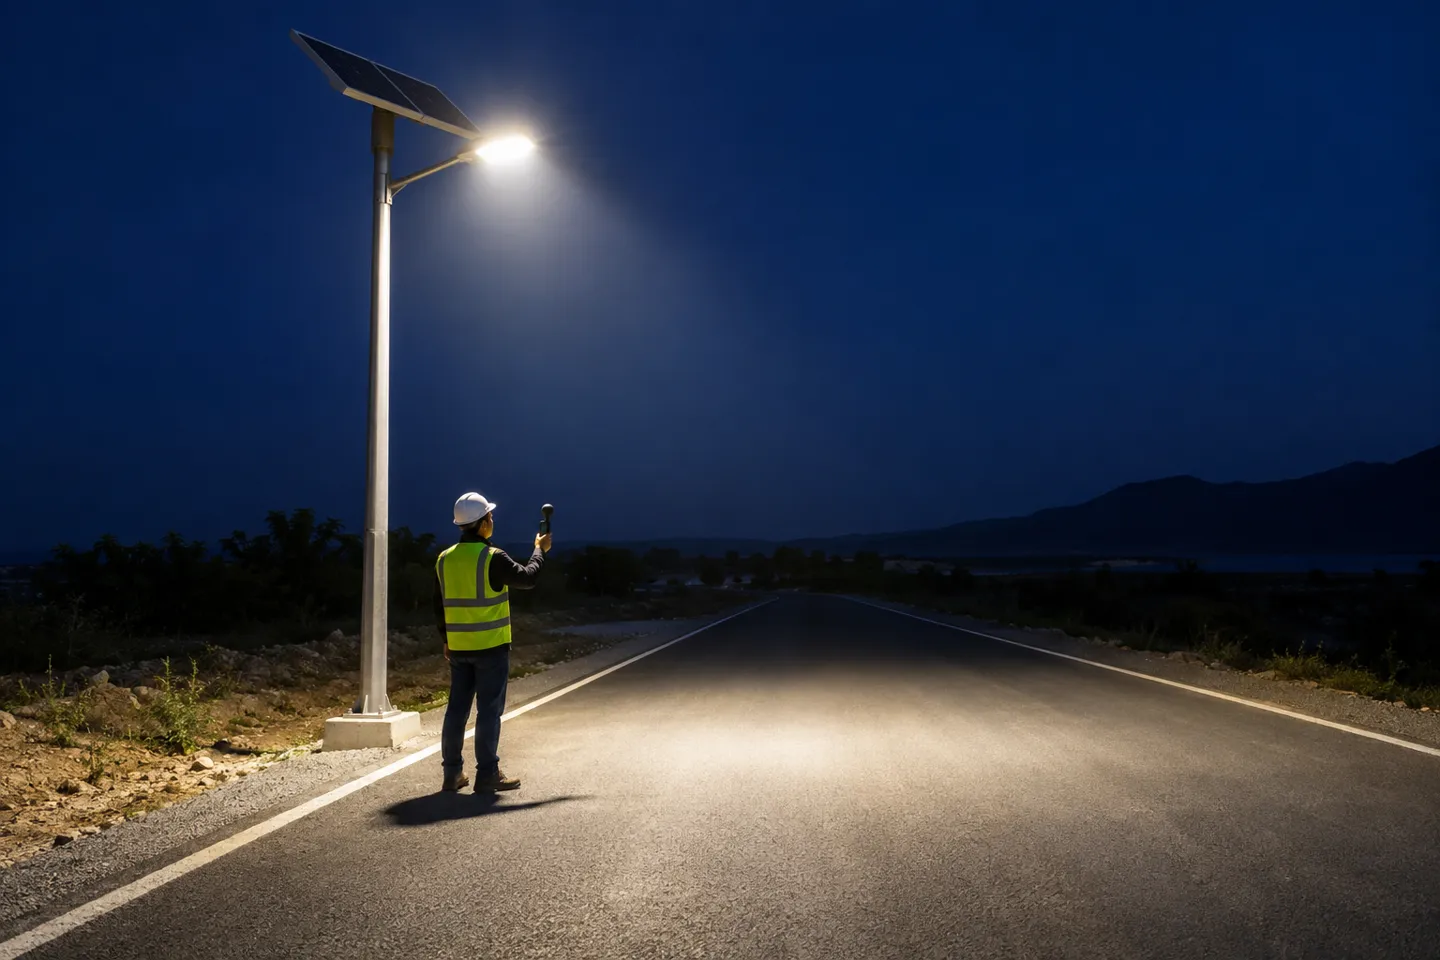
Commissioning is three confirmations. First, set the controller’s working mode as the project requires: light-control dusk-to-dawn, time-control, or motion-adaptive, per the manual rather than the default. Second, confirm the first full charge, ideally by leaving the system in absorb through one clear day before the first night test. Third, measure, at night, the illuminance actually delivered on the ground.
Then put those numbers on an acceptance sheet with dates and instrument readings. An installed lamp is not a delivered lamp. The difference between the two is exactly this sheet, and it is the cheapest contract document on the project.
When It Will Not Light: A Diagnosis Order
When a unit goes dark, check in this order and resist skipping ahead.
The five-step diagnosis order
- 1Settings and pairing — mode switches, remotes and timers get reset far more often than crews expect.
- 2Battery — the wear part; deep-winter discharges age it fastest.
- 3Connectors and water ingress — check them right after storms.
- 4Panel — shade that grew with the trees, glass cracked by vandalism.
- 5LED head and driver — fail least, so they are checked last.
A real case shows why the order matters. A homeowner inherited a solar street lamp that “never worked well” from a previous owner. The wire inside the pole was not live at all: a grid-era lamp position had been fitted with a solar unit as a visual replacement, with no system behind it (r/HomeMaintenance, 2024). Diagnosis started at the lamp when it should have started at the survey.
Theft and Vandalism Hardening
Theft is a structural problem, so it gets structural answers. Battery boxes bolted to poles are the classic target; integrated units that seal the battery inside the lamp body remove the easiest prize. Split systems compensate with anti-tamper bolts, locked access doors, and panels mounted high enough that removal becomes a two-person job in daylight.
Cities fighting serial vandalism have gone further. Los Angeles crews now weld shut streetlight access doors after repairs, because a single vandalized pole was costing the city over $10,000 in copper and damage (r/LosAngeles, 2025). When a city plans tens of thousands of solar units, the replacement economics get concrete fast.
Replacement is a recurring bill
Per-unit hardware on a large municipal retrofit, one commenter’s estimate (r/solar, 2026): $450 LED head + $450 battery pack + $400 wind-rated panel. Treat it as indicative — and price every security bolt in the contract against a recurring loss, not a hypothetical one.
Reading the Installation as a Contract Item
Step back from the work packages and reread them as money. Every failure pattern in the foundation section was an installation quality failure, not a product failure: someone bent a bolt to make it fit, or stood the pole before the concrete was ready. Every theft case was a specification gap, not an operational lapse. And every acceptance test in the commissioning list is a line you either wrote into the contract or left unwritten.
That is the core of it: installation quality is the first warranty clause, not the last construction task. Manufacturers price their warranties against factory-controlled conditions, and the better ones are upfront about the split. Some run separate production lines for their two-year and five-year warranty products precisely so the standards cannot blur. But no factory control survives a crew that bends an anchor bolt to make it fit. If the contract promises five years, the installation clauses have to be engineered backward from that promise: bolt templates checked before the pour, cure verified before the lift, acceptance tests signed before payment.
The same logic prices the alternative. Squeezing the unit price is a rational strategy only while the failure costs it can create stay smaller than the savings, and on real projects those costs include rework, stolen hardware, and the warranty disputes that follow both. On projects with a service life beyond three years and any theft exposure, that condition regularly inverts. The cheapest lamp becomes the most expensive one on the road. Writing the installation specs and acceptance tests into the contract costs a drafting session. Skipping them costs the margin you were protecting.
Suppliers, for their part, can be evaluated on these terms before the award. Does the warranty cover the whole lamp, and who carries freight and duty on a claim? Is the installation documentation complete enough to hand to a crew? Does the certification portfolio cover the customs and utility approvals your project will face? Those answers separate a partner from a box-shipper long before the first pole is set.
WOSEN builds its solar street light line as six series spanning 1,500 to 14,000 lumens, each factory-listed with a 5-year warranty. Every unit is backed by 12-hour response on overseas inquiries and a repair-to-compliance re-shipment policy. The after-sales and warranty terms are public, as is the certification portfolio (after-sales and warranty terms) (certification portfolio). We document installation and acceptance the same way we document production, so a crew on site and an inspector at handover are reading the same numbers.
If you are comparing suppliers for a solar street light tender, WOSEN’s catalog and project references are available online.
Get a series recommendation for your road and sun zone
WOSEN’s six solar street light series span 1,500–14,000 lumens with a factory-listed 5-year warranty. Send your road width, pole height and sun zone — the recommendation comes back with the warranty and certification terms in writing.
Start a project inquiry

 English
  Spanish
  French
  German
  Italian
  Arabic
  Russian
  Portuguese
  Dutch
Dutch  Indonesian
  Turkish
  Polish