
What Are the Parts of a Street Light?
A cobra-head street light passing over an intersection looks like one object, but it is assembled from four systems that are bought, installed and repaired by different people. The luminaire head holds the light source, the optics and the driver. A set of control and electrical parts decides when it switches on. The pole and its mounting hardware carry everything above your sightline. Below grade, a foundation and its anchor hardware keep the whole assembly upright in a storm. Knowing which part belongs to which system lets a maintenance crew order the right spare. It also lets a buyer compare two quotes that look similar on paper.
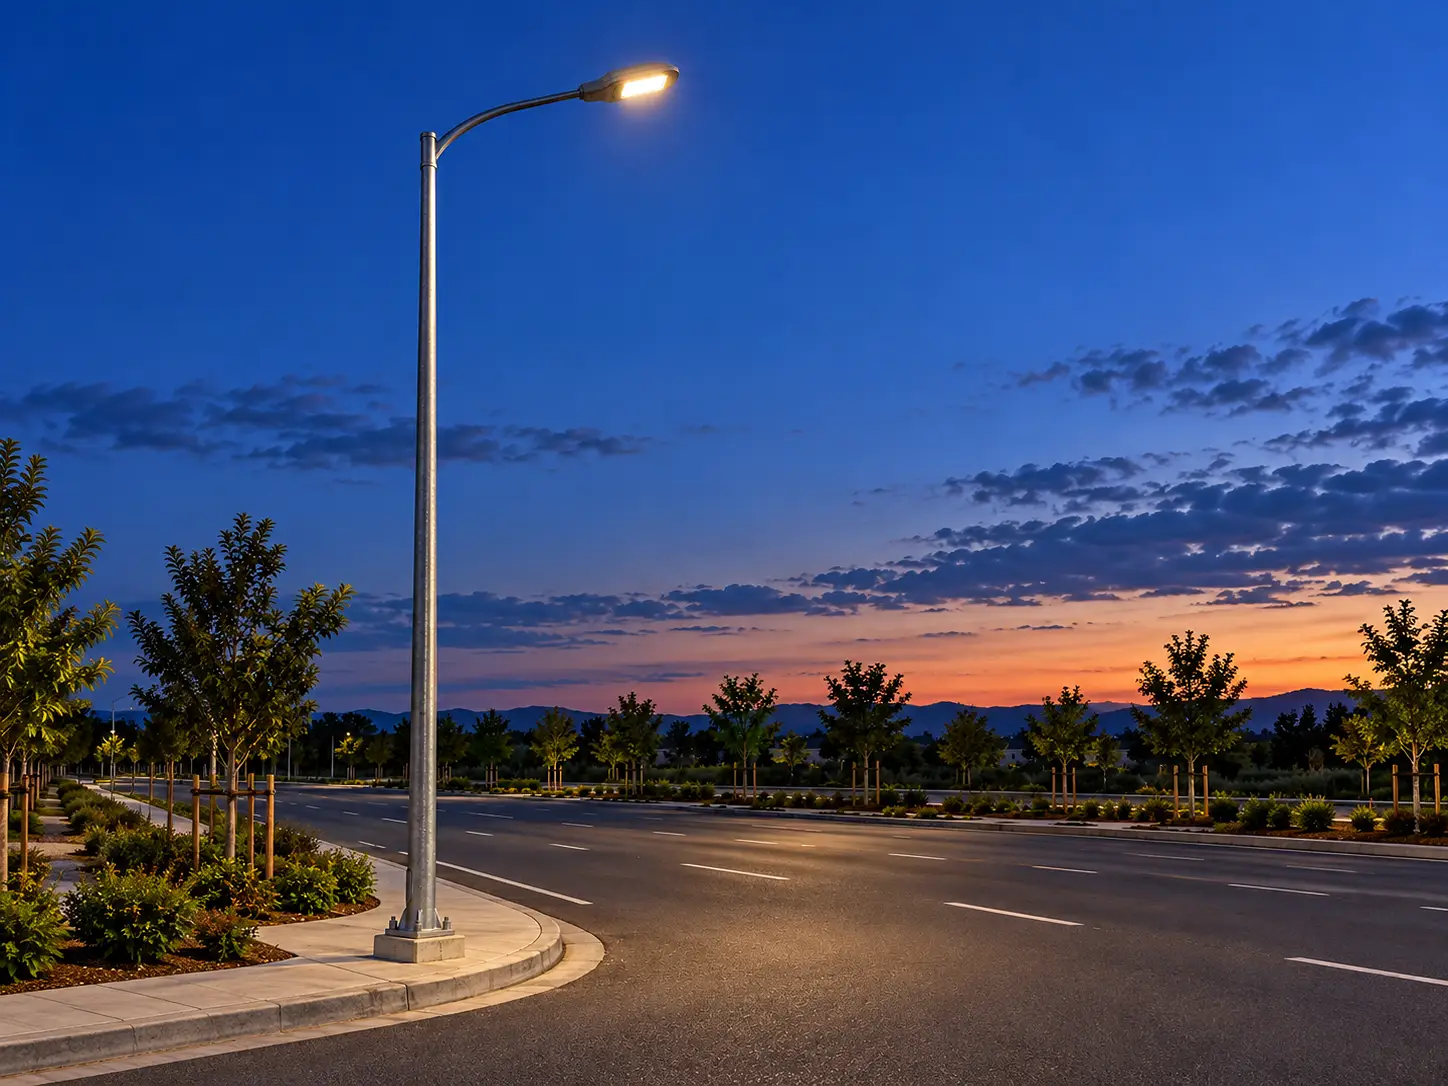
People use the names loosely. Street light, streetlamp, lamppost, light standard and lamp pole all describe the same raised source of light at the edge of a road. One clarification before the anatomy. This is a breakdown of what a street light is made of, not a parts store catalog and not traffic signals, which are a different trade.
The four systems break down like this:
- Luminaire head: LED source, lens, driver, housing, gaskets, glass, fasteners
- Control and electrical parts: photocell, locking receptacle, shorting cap, wiring
- Pole and mounting hardware: pole shaft, hand hole, base plate, tenon or arm, anchor fasteners at the top
- Foundation and below-grade parts: concrete base, anchor bolts, conduit, rebar
The rest of this article walks through each system in that order, from the part most people see to the part nobody sees. Along the way it gives the specification ranges that separate a part that lasts from a part that fails. Two street lights of the same wattage usually differ inside these details.
Luminaire head
At the top
Control & electrical
On the head
Pole & mounting
Up the pole
Foundation
Below grade
Inside the Luminaire: Street Light Head Parts and Specs
The head is where most of the engineering lives, and where most specification sheets concentrate. Four component groups decide whether a head runs for a decade or starts brownouts in year three.
LED Source and Optics
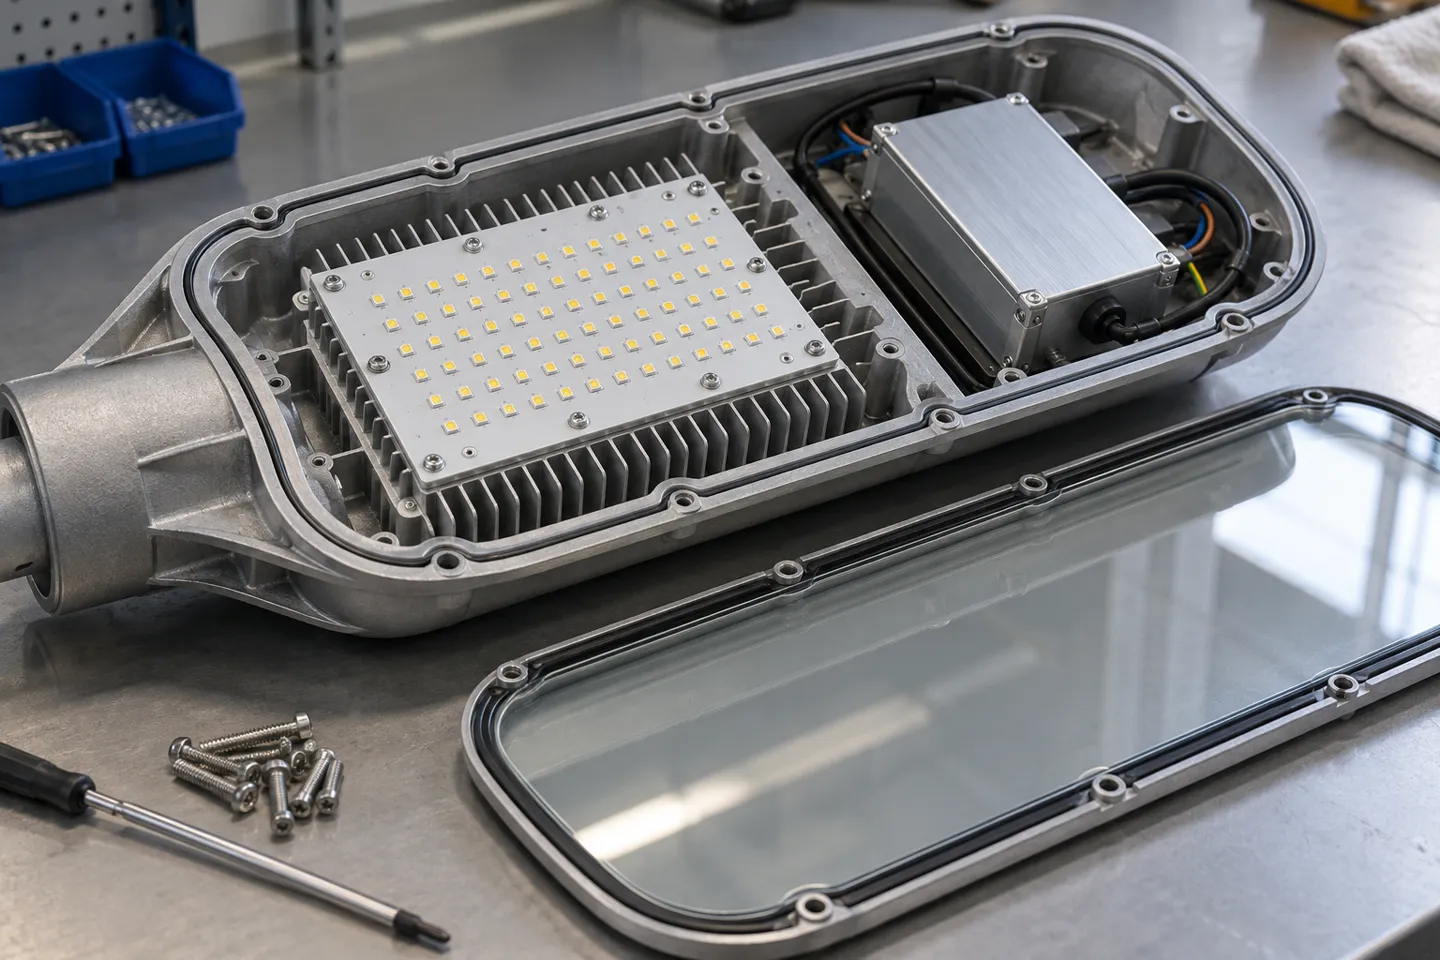
Modern heads replaced the bulb-and-ballast arrangement of high-pressure sodium fixtures with an LED board behind a lens, so the light source and the optics are now designed together. The lens material matters more than most buyers expect. Polycarbonate lenses tolerate continuous temperatures up to about 110°C and resist UV better. Acrylic lenses transmit slightly more light but should stay under about 80°C (Moonlight, n.d.). Hot-climate projects that skip this check end up with yellowed, hazy lenses within a few summers. Manufacturers also offer different optic angles for different road widths, and a catalog listing several angle options signals a supplier that configures its own lens line.
LED Driver, the Real Lifespan Ceiling
The driver converts mains power into the constant current LEDs need, and it is almost always the first major component inside the head to die. LED chips are rated for tens of thousands of hours. The driver’s electrolytic components age faster, which is why housing suppliers describe the driver as the part that sets the fixture’s real service life (Moonlight, n.d.). Brand grade is the practical lever here: the same supplier community points to Mean Well, Philips and Osram as the driver brands that survive overseas voltage swings and heat. For scale: one current 50-240W street light series on the export market publishes AC 100-240V input, 220 lm/W efficacy, 2700-6500K CCT, a 50,000-hour rating and IP65/66 protection on one datasheet. The same page lists a 5-year warranty and driver upgrades to higher brands as a priced option. When a quote does not name the driver at all, that is the line item to ask about.
Housing, Gaskets and the Quiet Work of Keeping Water Out
Die-cast aluminum does three jobs at once. It carries the LED board’s heat out through fins, keeps the optics aligned, and gives the gaskets a rigid flange to compress against. The gasket itself is what actually delivers the IP rating, not the aluminum. A molded silicone gasket in a clean die-cast slot seals for years; the same housing with a cheap foam gasket weeps at the first thermal cycle. Some better datasheets also list a pressure-balancing breather valve. It is a small part that equalizes pressure as the head heats and cools, so the gasket is never forced open by trapped air. None of this shows up in a product photo, which is exactly why it belongs on an inspection checklist.
Glass and Fasteners
The flat glass over the lens is typically 4-6 mm tempered glass, sized to pass IK08 to IK10 impact tests with light transmittance above 90% (Moonlight, n.d.). The fasteners are the last detail and a revealing one. Exterior screws in stainless SUS304 resist corrosion on the weather side. Interior screws stay plain steel because they live in a dry cavity. A fixture with rusted external screws in year two was built to a price, and its gaskets are usually the same story.
| Component group | Typical spec range | Low grade vs high grade | Where it fails |
|---|---|---|---|
| LED source and lens | 2700-6500K, Ra≥70, optics 15-120° | Acrylic lens (≤80°C) vs PC lens (≤110°C) | Lens yellows and hazes in heat |
| Driver | AC 100-240V, dimmable options | Unbranded vs Mean Well/Philips/Osram | First major part to die; sets fixture life |
| Housing and gaskets | Die-cast aluminum, IP65/66 | Foam gasket vs molded silicone + breather valve | Gasket weeps at thermal cycles; water ingress |
| Glass and fasteners | 4-6 mm tempered, IK08-IK10 | Plain screws vs SUS304 outside | Screw rust marks corrosion path; glass survives |
Read as a set, the matrix says something the spec sheet never prints: three of the four failure paths are sealing and corrosion issues, not light issues. That is why the next system, the parts that switch the light on and off, causes more service calls than the LED itself.
Control and Electrical Parts: Photocell, Receptacle and Shorting Cap
Between the head and the pole wiring sit the parts that decide when the light runs. They are small, cheap relative to the fixture, and responsible for a disproportionate share of no-light complaints. How the switching logic works hour to hour is its own topic; what follows is the parts themselves and what they cost when they fail.
Photocell and the Locking Receptacle
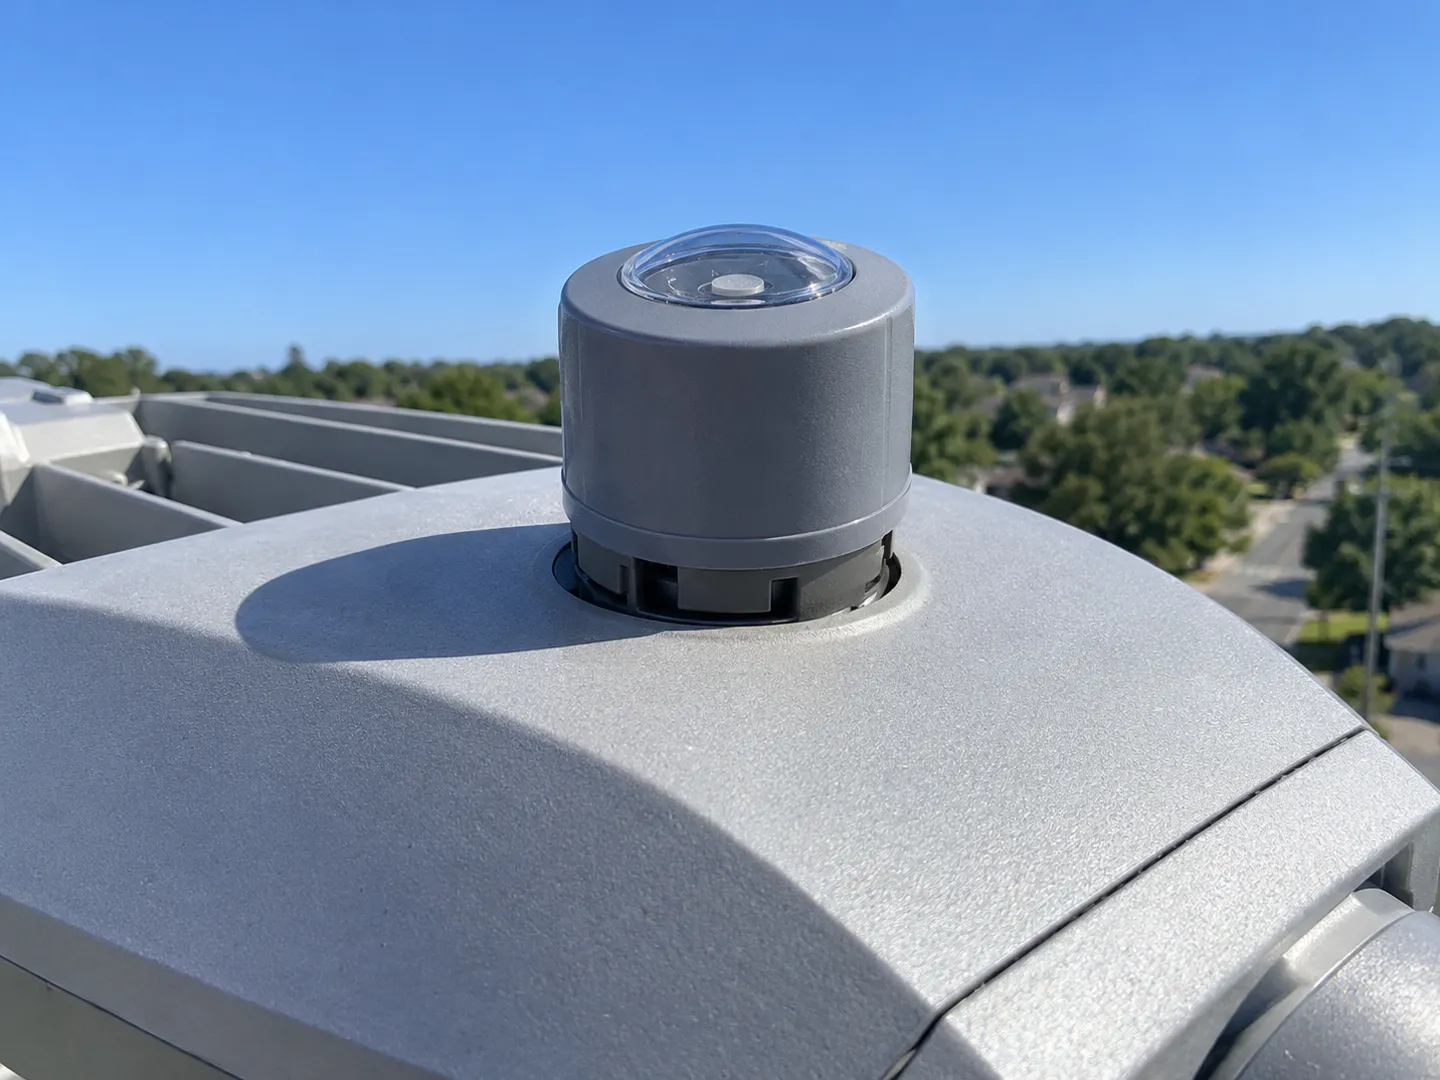
A photocell is a light sensor that closes the circuit at dusk and opens it at dawn. On roadway fixtures it plugs into a receptacle on top of the luminaire rather than being wired in place. That receptacle is standardized: ANSI C136.10 defines the locking-type photocontrol device and its mating receptacle, the three-pin twist-lock format used across US municipal procurement (MAPC, 2017). The standardization is the point. A city can buy photocells from any compliant vendor and twist them into any compliant fixture, which turns a sensor into a consumable rather than a proprietary part. Buyers writing specifications should ask for the receptacle by standard number, not by the word “photocell-ready”, because the latter can mean anything.
Shorting Caps and the 7-Pin Shift
When a line runs on a timer or a central management system instead of a sensor, the receptacle gets a shorting cap. It is a sealed plug that jumps the contacts so power flows straight through. It looks like a trivial cap, and it gets forgotten. The reminder arrives when a fixture wired for a photocell sits dark at noon or stays on all day. The receptacle standard itself is expanding. ANSI C136.41 added extra pins for dimming, and recent municipal documents show it moving into default position. A Chicago-area village lists the 3-wire receptacle as standard, with the 7-wire version available (Village of Downers Grove, 2025). A Hawaii county designed its whole conversion around the 7-pin receptacle (Maui County DPW, 2022). The pattern in new specifications is clear: receptacles are being bought dimming-ready even when the first generation of heads is not dimmable. The boundary to note is that a 7-pin receptacle does not make a fixture dimmable; the extra pins are empty conductors until a dimmable driver sits behind them.
What a Repair Actually Costs
Diagnosis on a dark fixture should run in a fixed order: check the photocell first, then the driver, then the LED source. An electrician on r/Lighting puts it the way working crews do: check the photocell on top before committing to swapping the whole fixture (r/Lighting, 2026). The economics behind that advice are lopsided. Photocells die periodically, as one homeowner’s thread about a dusk-to-dawn sensor records (r/fixit, 2022). The part itself is cheap: a respondent on a landscaping forum calls it a ten-dollar part and an easy fix (r/landscaping, 2023). The labor is what costs. On the same platform, a homeowner asked whether a $461 quote to replace one photocell was reasonable (r/AskElectricians, 2024).
The gap between those two numbers is the whole argument for knowing your parts: a ten-dollar photocell against a $461 service call for the same repair.
The repair economics
The photocell is the cheapest component on the fixture and the one that fails most often. Specifying the C136.10 receptacle and stocking spare photocells turns a $461 truck roll into a two-minute twist-lock swap.
Whole-fixture replacement makes sense when the head is a legacy technology being converted, which is precisely what the county conversion documents above describe. When the head is a current LED unit, replacement is usually the wrong answer to a sensor problem. It is smarter to contract around the part. One 2026 operations and maintenance RFP prices photocell replacement as its own line item (Public Lighting Authority, 2026), and that contract is priced for reality rather than for pessimism.
Diagnosis order on a dark fixture: 1) photocell (twist it out, test or swap, clean the window), 2) driver (measure output, listen for clicking), 3) LED source last. Replacing the fixture before checking the photocell is the most expensive mistake in street lighting maintenance.
Pole and Mounting Hardware: Shafts, Tenons and Anchor Bolts
Above the wiring and below the head, the pole system is a set of machined interfaces, and interfaces are where ordering mistakes happen. The shaft carries a hand hole near its base, a covered opening that gives the electrician access to make splices and service the internal wiring. The wiring that feeds the head runs up the inside of the pole, not through the air. At the bottom, a flat base plate bolts to the foundation, and a base cover hides the bolts and plate from weather and passers-by.
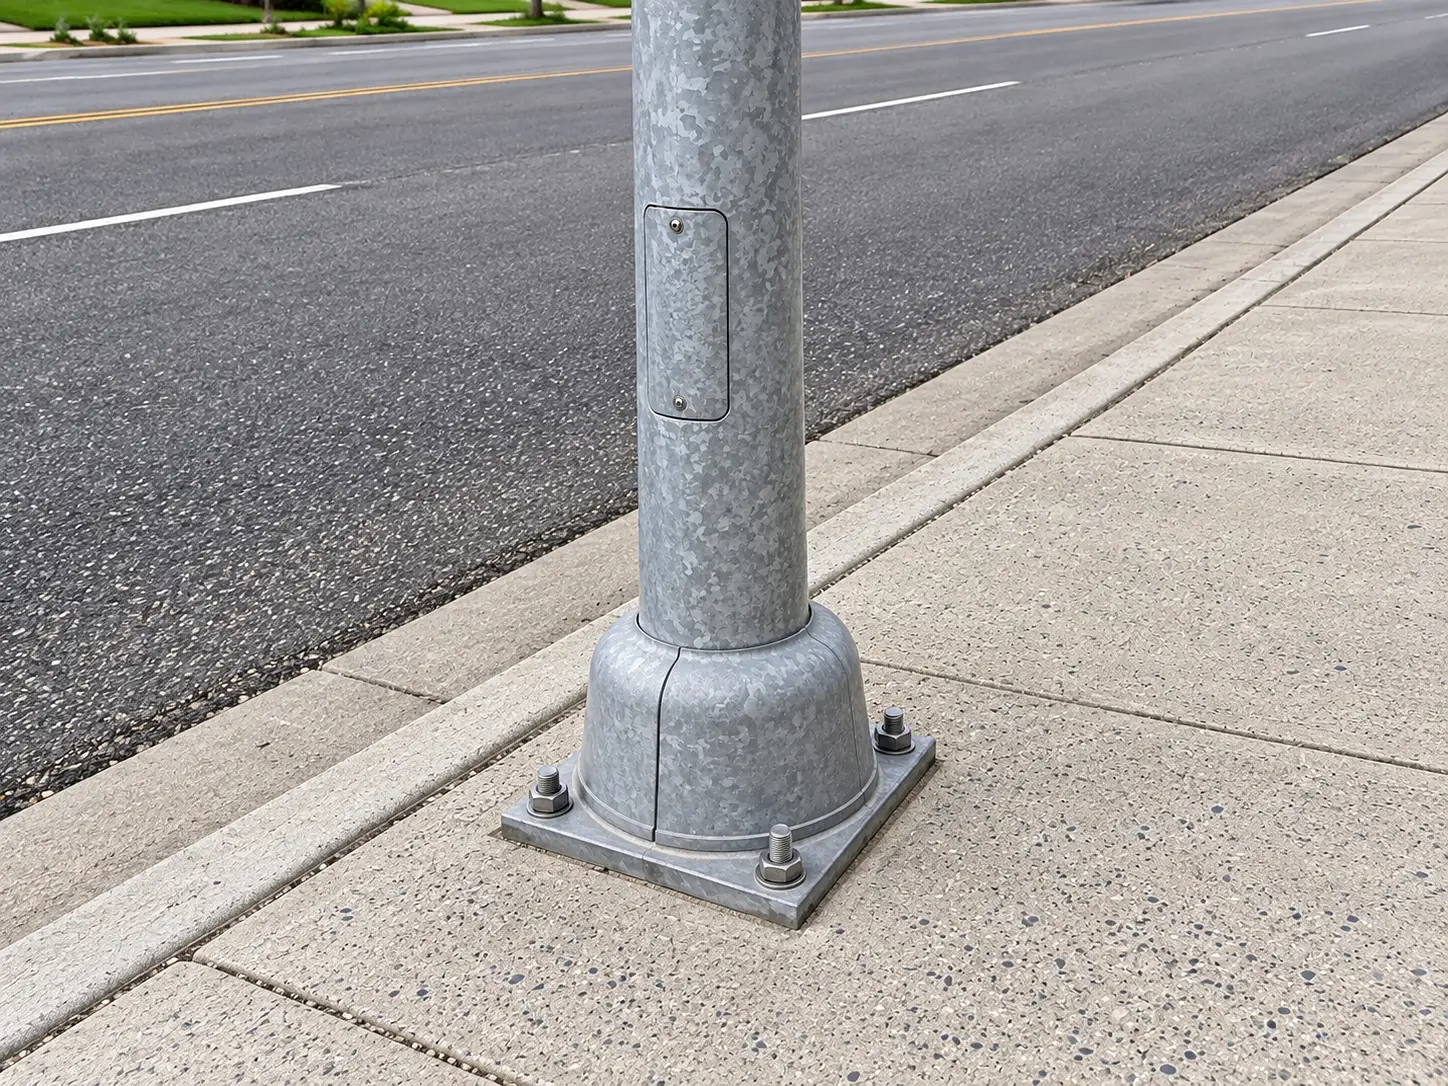
The top of the pole is an interface decision. Most roadway arms and fixtures mount to a tenon, a short cylinder welded into the pole top. The dominant tenon diameter is 2-3/8 inches, with 3-inch and 4-inch versions specified for heavier fixture loads (LightMart, 2021). Bullhorn brackets spread two or more fixtures across a parking area. Spoke brackets serve intersections, and side brackets mount fixtures against a building wall. Tenon adapters convert between diameters when a fixture from one catalog meets a pole from another. Two options earn their keep in specific sites. A vibration damper suits poles in sustained wind or carrying cameras. A pole cap applies whenever the fixture mounts to the side rather than the top, leaving the tenon unused.
At the foundation end, anchor bolts are sized to the pole, not chosen from a shelf. Typical values run 3/4 inch by 17 inches with a 3-inch J-hook for poles up to 20 feet. Longer bolts serve taller poles, and 30 to 40 foot models take 1 inch by 36 inches (LightMart, 2021).
| Pole height | Typical anchor bolt | J-hook |
|---|---|---|
| Up to 20 ft | 3/4 in. x 17 in. | 3 in. |
| Above 20 ft | approx. 30 in. long | 3 in. |
| 30-40 ft | 1 in. x 36 in. | sized to base plate |
The buying note that saves the most grief is also the simplest: confirm the fixture’s mounting interface against the pole’s tenon before either ships. A 2-3/8 inch tenon meeting a fixture that expects a different pattern means adapters, return freight and a crew standing idle. That is why importers check the tenon line on the datasheet before the price line.
Before either box ships, send WOSEN the fixture datasheet and the pole schedule, and get the tenon, bolt pattern and mounting height confirmed line by line.
Get a Mounting CheckFoundation and Below-Grade Parts
Below grade, the parts are concrete, steel and conduit, and they are installed once. The poured foundation carries the overturning load of the whole assembly. Its depth is set by soil bearing, wind exposure and pole height rather than by habit. This is why the pole vendors themselves defer the design to a foundation engineer and local code (LightMart, 2021).
The embedment kit around that pour has a fixed cast of characters. Anchor bolts are positioned with a paper drilling template that ships with the pole, leaving four bolt holes plus a center hole for conduit. Rebar ties the concrete together, and a cylindrical Sonotube form holds the pour’s shape. The conduit matters more than it looks. It is the raceway that carries the supply wiring up through the foundation and into the pole’s hand hole. A foundation poured without it means core-drilling later.
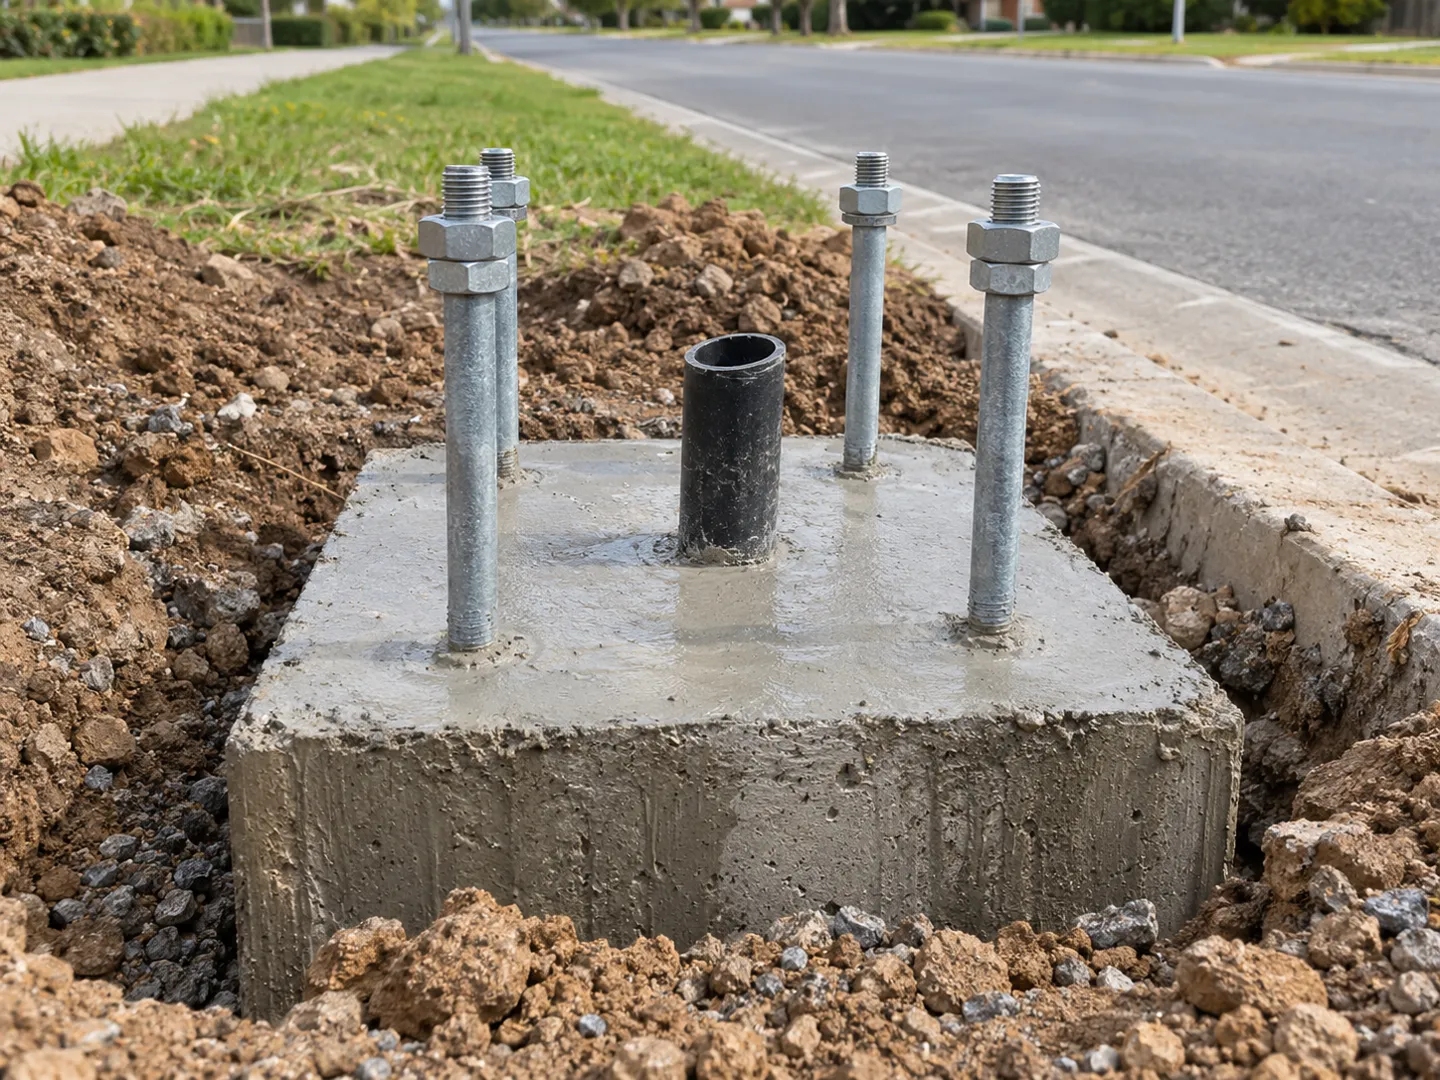
One variant skips most of this kit. Direct burial poles sink straight into a hole at least 6 inches wider than the pole diameter, no base plate, no anchor bolts, no pour (LightMart, 2021). It suits short poles in sheltered locations. It fails as a strategy anywhere height or wind load makes overturning the governing case. State that boundary in writing before a value-engineering meeting adopts direct burial.
Responsibility splits along the same line as the parts. Foundation, rebar and conduit belong to the civil contractor. Pole and luminaire belong to the supplier. The handover point is the base plate, where anchor bolt projection and orientation must match the pole’s drilling template. Projects that put that match-check in the contract spend commissioning week lighting lights rather than grinding concrete.
How Solar Street Light Parts Differ
Take away the grid and the parts list rearranges itself. A solar street light keeps the LED source, the optics, the housing, the gaskets and the pole hardware. The parts that did the grid’s job get re-implemented around three new components: a photovoltaic panel, a rechargeable battery and a charge controller that manages both. Those replaced parts include the incoming power feed, the driver’s mains conversion and the photocell’s role in scheduling. Integrated designs fold all three into the fixture itself, which is the format most export catalogs now lead with.
| Grid-tied street light | Solar street light | What changed |
|---|---|---|
| Mains connection and internal driver wiring | PV panel + charge controller | Power source replaced |
| Driver sized for continuous mains | Driver logic absorbed into battery system | Voltage path redesigned |
| Photocell or timer for scheduling | Controller logic (photosensor or timer built in) | Scheduling moves into the controller |
| LED source, lens, housing, gaskets | Same parts | Unchanged |
| Pole, tenon, anchor bolts, foundation | Same hardware, panel adds wind load | Foundation must include panel area |
The failure profile moves with the parts. On a grid fixture the driver is the wearing part. On a solar fixture it is the battery: its cycle count runs out years before the LED does, and every downstream component is hostage to its schedule. Forum threads record the failure mode from the buyer’s side: a homeowner whose solar conversion left the pole wiring dead and the lamp unreliable (r/HomeMaintenance, 2024). The boundary that separates a working solar road from a disappointing one is autonomy. The battery must carry the light through the year’s longest run of overcast nights. That sizing is a calculation from local sunlight data, not a catalog default. Ask a supplier to show that calculation, with the site’s daylight numbers and the resulting panel and battery sizing. It is the one question the datasheet cannot answer by itself.
What the Parts List Means for Buyers
Everything above reduces to one purchasing position: the parts age at different rates, so judge them separately. The driver dies before the LED, and the photocell dies before both. A whole-unit price negotiation flattens those differences. A unit price alone cannot tell a five-year fixture from a two-year one wearing the same housing. Buyers who win on lifecycle cost are the ones whose acceptance checklist lands on the short-lived parts.
A parts-level acceptance list that survives contact with a supplier meeting looks like this:
Street light RFQ acceptance checklist
- Driver brand and grade (unbranded defaults are the first cost cut)
- Photocell interface by standard (C136.10 3-pin, or C136.41 7-pin if dimming is planned)
- Gasket material and breather valve
- External fastener material (SUS304)
- Glass thickness and IK rating (4-6 mm, IK08-IK10)
- Lens material and temperature limit (PC vs acrylic)
- Mounting interface (tenon diameter) matched to the pole
- Battery chemistry and autonomy calculation for solar units
- Warranty years and what the warranty actually covers
- Spare-parts ratio for the first service year, weighted toward photocells and gaskets
The warranty line deserves its own reading, because high-warranty products are not the same products with a longer promise. Suppliers who engineer for 5-year warranties run those units as physically separate production lines. They upgrade the fasteners to stainless, grade the PCB copper content by warranty tier and mount brand-name drivers on the long-warranty lines. The warranty document and the bill of materials are the same statement written twice, and a buyer who reads only one of them is negotiating blind.
At WOSEN, we publish the solar street light series and the grid-tied line part by part. The solar series carry a listed 5-year warranty on their series pages. Drivers can be specified up to Meanwell, Inventronics or Philips grades when the warranty tier demands it, and overseas inquiries get a 12-hour response commitment. Send the checklist above with your RFQ and we will return a component-level breakdown against every line, because that is the quote we would want to receive.
Build Your RFQ on the Parts List
Send your checklist and receive a component-level quote against every line, from driver grade to gasket material, with a 12-hour response on overseas inquiries.
Send Your RFQReferences
- MAPC. “LED Street & Outdoor Lighting Program.” 2017. https://www.mapc.org/wp-content/uploads/2017/10/LED_Streetlights-DLTA_Report.pdf
- Maui County Department of Public Works. “Maui County Streetlight Conversion Project.” 2022. https://files.hawaii.gov/dbedt/erp/Doc_Library/2022-07-23-MA-DEA-Maui-County-Streetlight-Conversion-Project.pdf
- Village of Downers Grove. “Motion 2025-10713: Streetlight Replacement Contract.” 2025. https://agendadocs.downers.us/public/docs/agendas/2025/03_04_2025/MOT_2025-10713.pdf
- Public Lighting Authority. “2026 Street Light Operations & Maintenance and Related Services RFP.” 2026. https://www.publiclightingauthority.org/wp-content/uploads/2026/08/RFP-PDF-2026-1.pdf
- r/Lighting. “How Do I Change a Light Bulb on This Street Light?” Reddit, 2026. https://www.reddit.com/r/Lighting/comments/1x2jhr5/how_do_i_change_a_light_bulb_on_this_street_light/
- r/fixit. “Street Lamp Dusk/Dawn Sensor — How to Replace?” Reddit, 2022. https://www.reddit.com/r/fixit/comments/w5i1k1/street_lamp_duskdawn_sensor_how_to_replace/
- r/landscaping. “Does Anyone Here Know How to Turn These Lights On and Off?” Reddit, 2023. https://www.reddit.com/r/landscaping/comments/16b50iq/does_anyone_here_know_how_to_turn_these_lights_on/
- r/AskElectricians. “Reasonable Price for Photocell Replacement?” Reddit, 2024. https://www.reddit.com/r/AskElectricians/comments/197copp/reasonable_price_for_photocell_replacement/
- r/HomeMaintenance. “Previous Owner Replaced Street Lamp with a Solar Powered Option.” Reddit, 2024. https://www.reddit.com/r/HomeMaintenance/comments/1c9ryoi/previous_owner_replaced_street_lamp_with_a_solar/

 English
 Spanish
 French
 German
 Italian
 Arabic
 Russian
 Portuguese
 Dutch
 Indonesian
 Turkish
 Polish